Amazing DIY LED Neon Sign Projects: 5 Easy Ideas for Home
DIY LED neon sign projects are one of the most creative ways to personalize your home decor without overspending on pre-made designs. With some LED neon sign materials, a bit of patience, and a clear plan, crafty homeowners can design and build glowing statement pieces that look both professional and unique. At euNeon, we see that many customers begin experimenting with homemade LED neon sign ideas before deciding to order a professionally finished sign — and that’s why we’ve created this detailed guide.
Not only are LED neon signs safer and easier to handle than traditional glass neon, but they are also highly customizable. With colored acrylic or UV-printed backings, different fonts, and a wide variety of colors, your DIY neon project can truly match your vision. And if you’d like a professionally made version after experimenting, euNeon offers Free EU shipping, CNC precision, and plug-and-play signs ready in about one week.
Why DIY LED Neon Sign Projects Are Worth Trying
DIY LED neon sign projects give you freedom that store-bought decor can’t. Instead of choosing from limited off-the-shelf designs, you can create something that reflects your personality, your family’s identity, or the vibe of your space.
Top reasons to try DIY LED neon projects:
- Affordability: building your own sign can be a budget DIY neon home decor project.
- Creativity: you control fonts, shapes, and colors.
- Learning: working with tubing and LED strips builds hands-on skills.
- Flexibility: test your design at home, and later upgrade to a professional build if you want durability.

Essential LED Neon Sign Materials You’ll Need
Before starting, make sure you have the right tools and supplies. Choosing quality LED neon sign materials ensures your project lasts and looks professional.
Choosing the right tubing
Flexible LED neon tubing is available in different diameters. Thinner tubes are easier to shape but may not glow as strongly. For home projects, 6–8 mm is a safe balance.
Power supply and controllers
Always match your LED strip voltage to the correct adapter. Many DIYers also add a dimmer or remote controller for better usability. A reliable 12V adapter is the standard choice for most DIY neon projects.
Colored acrylic and UV-printed backings
Instead of wood, many modern DIY projects use colored acrylic sheets or UV-printed backings. These help keep the tubing securely fixed while also adding style. Acrylic is lightweight and easy to cut, while UV printing allows you to add graphics, logos, or patterns behind your sign.

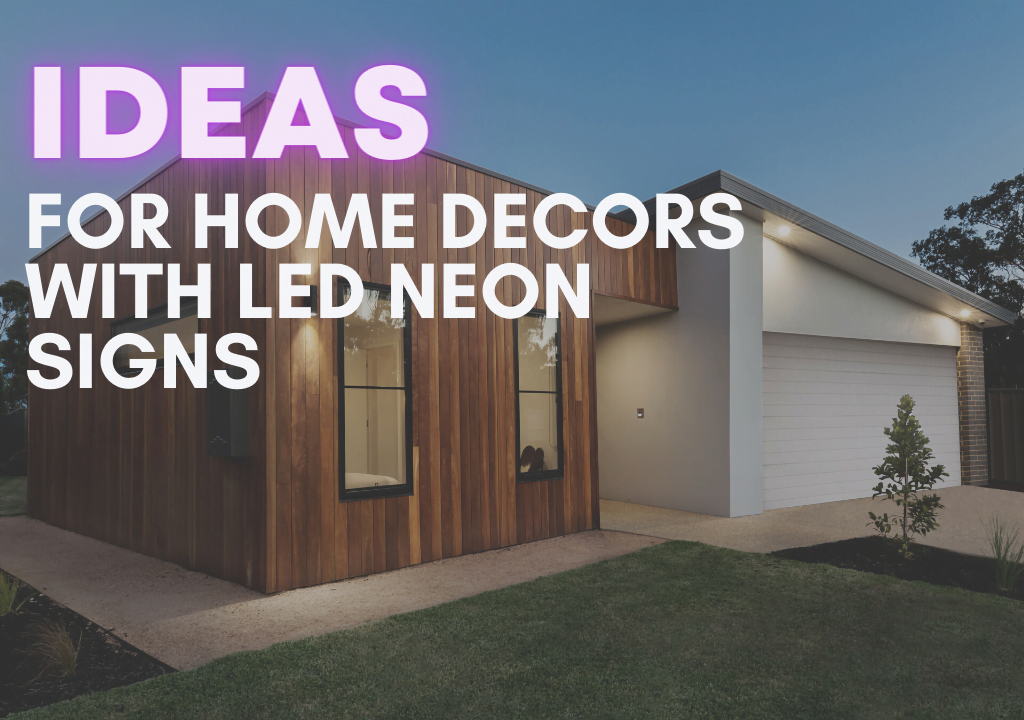
5 DIY LED Neon Sign Project Ideas for Every Room
Below are practical homemade LED neon sign ideas you can adapt for different spaces in your home. Each one can be adjusted depending on the colors, fonts, or shapes you prefer.
Bedroom glow sign
Create a personalized word or phrase, like “Dream” or your name, to hang above the bed. Choose softer neon tones such as pink, lavender, or warm white for a cozy, relaxing atmosphere.
Living room focal sign
Design a centerpiece for your living room wall. This could be an abstract shape, your family initials, or even a simple line drawing. A neon sign here instantly becomes a conversation starter and focal point of the room.
Motivational home office sign
Boost productivity by making a motivational phrase such as “Focus” or “Keep Going.” Cool tones like blue or green give a calming effect while keeping the space professional.
Fun and inviting kitchen sign
Kitchens are social spaces — try playful signs like “Coffee Time” or a neon fork-and-knife silhouette. Bright yellow or orange creates an energetic vibe that feels welcoming.
Outdoor garden neon sign
Water-resistant tubing allows you to create signs for gardens or balconies. Words like “Relax” or decorative shapes such as stars and hearts can make summer evenings magical.
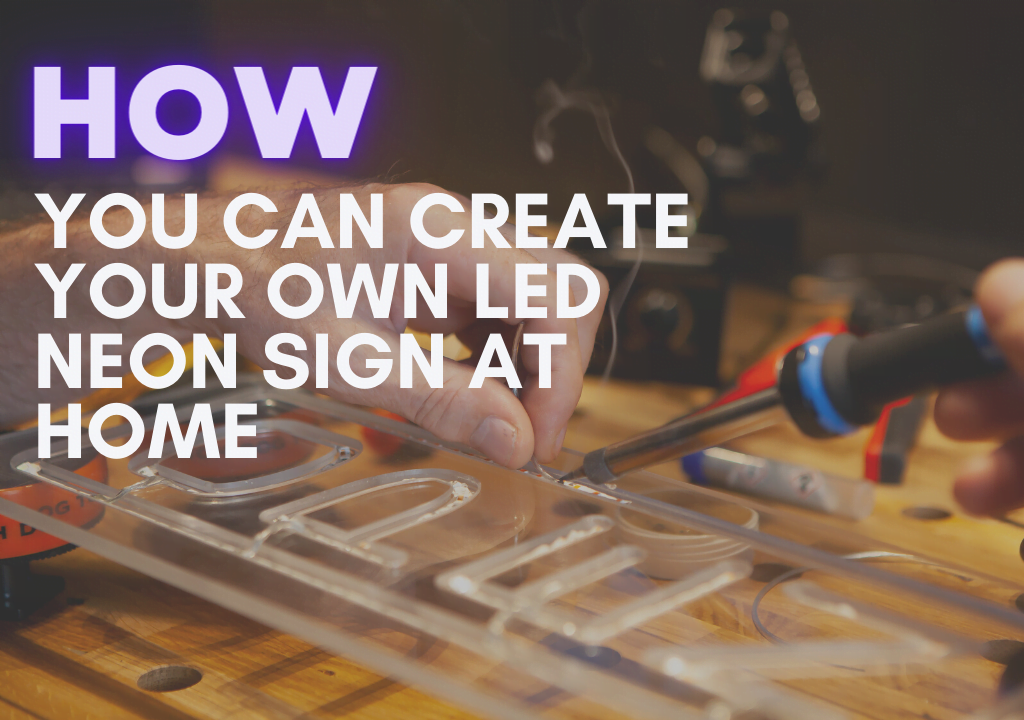
Step-by-Step: How to Make a DIY LED Neon Sign

Even if you’ve never built one before, an easy DIY neon sign tutorial can guide you through the process. Here’s a step-by-step approach that works for most projects.
Planning your design
Start with a clear idea. Sketch your design on paper or use design software. Mark every bend, curve, and line. Planning prevents waste and makes sure your tubing fits neatly onto the backing.
Shaping and fixing the tubing
Warm the tubing slightly with your hands or use a hairdryer on a low setting to make it flexible. Begin shaping along your sketched design. Fix the tubing to your acrylic backing with transparent clips or adhesive made for plastics.
Adding colored acrylic or UV-printed backings
Once the tubing is shaped, secure it to a pre-cut colored acrylic backing. If you want to add logos, text, or decorative patterns, UV printing is a great way to give your sign a professional finish.
Wiring and powering your sign safely
Carefully connect your tubing to a reliable 12V adapter. Many DIYers choose to include a dimmer or remote controller for extra control. Always double-check polarity and connections before plugging in.
Pro tip: Test each LED strip before fixing it permanently to avoid having to redo work later.
Tips to Make Your DIY Neon Sign Look Professional
Even homemade LED neon sign ideas can look as polished as store-bought versions if you follow a few practical tips:
- Keep letter heights and spacing consistent to avoid a messy look.
- Hide wires neatly behind the acrylic or route them along the edges.
- Avoid over-bending the tubing — smoother curves always look more professional.
- Use colored acrylic or UV-printed backings to add depth and style.
- Mount your sign with transparent standoffs to give it a “floating” effect.
- If possible, dim the brightness slightly for softer, more even glow.
Bold tip: If you’re creating budget DIY neon home decor for your living space, remember that subtle design often looks better than overly complicated shapes.

Why EUNEON (At-a-Glance)
DIY projects are fun and rewarding, but sometimes you want a professional finish that lasts for years. That’s where euNeon steps in.
Why choose euNeon:
- Plug-and-play, ready-to-mount signs.
- Free EU shipping included with every order.
- CNC precision craftsmanship for flawless backings.
- Choice of colored acrylic or UV-printed backings for extra customization.
- 12-month manufacturer warranty for peace of mind.
- Full kit included: custom LED neon sign, ceiling/wall mounting kit, 12-V power adapter, dimmer + remote, and 1.8-m power cord.

Our Streamlined Design & Delivery Process
Building your own neon sign is not as simple as ordering one from euNeon — which is way faster, more reliable, and the sign is ready to glow right out of the box.
How it works:
- Share your idea through our Custom Design Tool
- Receive a free mockup in approximately 6 hours.
- Production and assembly take about 1 week with CNC precision.
- Delivery arrives quickly with Free EU shipping.
This process ensures your sign is accurate, durable, and perfectly tailored to your vision — without the trial and error of DIY.


Creative Alternatives: When to Go Custom Instead
DIY LED neon sign projects are exciting, but sometimes going fully custom with professionals makes more sense. Here are scenarios where euNeon can save you time and ensure top quality:
- Complex logos or branding: Small details and intricate shapes are difficult to reproduce at home.
- Large-scale signs: Anything over 1 meter wide is challenging to mount and power safely with DIY methods.
- Outdoor durability: Professional-grade waterproofing and UV-resistant materials guarantee longer lifespan.
- Events and business use: If your sign represents your brand, perfection and reliability are critical.
In these cases, using euNeon’s expertise ensures flawless craftsmanship, quick turnaround, and a sign that lasts for years.

Conclusion: Bring Your DIY LED Neon Sign Projects to Life
DIY LED neon sign projects are one of the best ways to unleash your creativity and add a personal touch to your home. With the right LED neon sign materials, you can craft bedroom glow signs, living room focal pieces, motivational office designs, playful kitchen decor, and even outdoor garden signs. Each project is affordable, flexible, and fun — making budget DIY neon home decor achievable for any crafty homeowner.
And when you’re ready to take your design further, euNeon offers a professional solution. With Free EU shipping, plug-and-play installation, CNC precision, and options like colored acrylic or UV-printed backings, your custom neon will arrive in about one week — ready to hang and enjoy for years.
Ready to bring your dream sign to life? Start now with our Custom Design Tool
For daily inspiration, follow us on Instagram @euneons
Related reading for more ideas:


One thought on ““Amazing DIY LED Neon Sign Projects: 5 Easy Ideas for Home””
-
Pingback: Top 10 LED Neon Sign Designs for Your Home Decor - EUneon
This site uses User Verification plugin to reduce spam. See how your comment data is processed.